DCX Auto Mail
Automate your email communications with your customers directly from Microsoft Dynamics 365 Business Central.
Overview
The DCX Auto Mail app by Dynamics Connect empowers you to set up and automate customer statement and invoice email sending from within Business Central. Trigger emails based on specific events, schedules, or invoice posting, and customise templates to suit your needs.
Eliminate manual email tasks and ensure timely communication with your customers, vendors, and internal teams.
Key Benefits
- Automated Emailing. Set up job queues to send emails automatically.
- Customisable Templates. Create and manage your own email templates.
- Reduce Manual Work. Save time and reduce errors by automating email communications.
- Improve Communication. Ensure consistent and timely communication with stakeholders.
Why Choose DCX Auto Mail?
- Built in Microsoft Dynamics 365 Business Central.
- Flexible and configurable to meet your business needs.
- Easy to set up and use.
Get Started
Dynamics Connect experts will guide you through setup and configuration so you can be up and running quickly.
- Built in Microsoft Dynamics 365 Business Central.
- Backed by Dynamics Connect support and expertise.
Additional Resources
Browse other Dynamics Connect offerings, such as Adyen Payment By Link or Rest API Integrator.
Auto Mail Solution User Guide
This guide explains how to set up and use the Auto Mail solution for sending Customer Statements and Invoices automatically in Microsoft Dynamics 365 Business Central.
1. Initial Setup
Before using the solution, you must configure the email accounts and the Auto Mail Setup.
a. Email Setup Requirement
Ensure that Email Accounts are configured in Business Central. This solution uses the default email account setup to send emails.
- Search for Email Accounts.
- Ensure a default account is set up and tested.
b. Auto Mail Setup
Navigate to the Auto Mail Setup page.
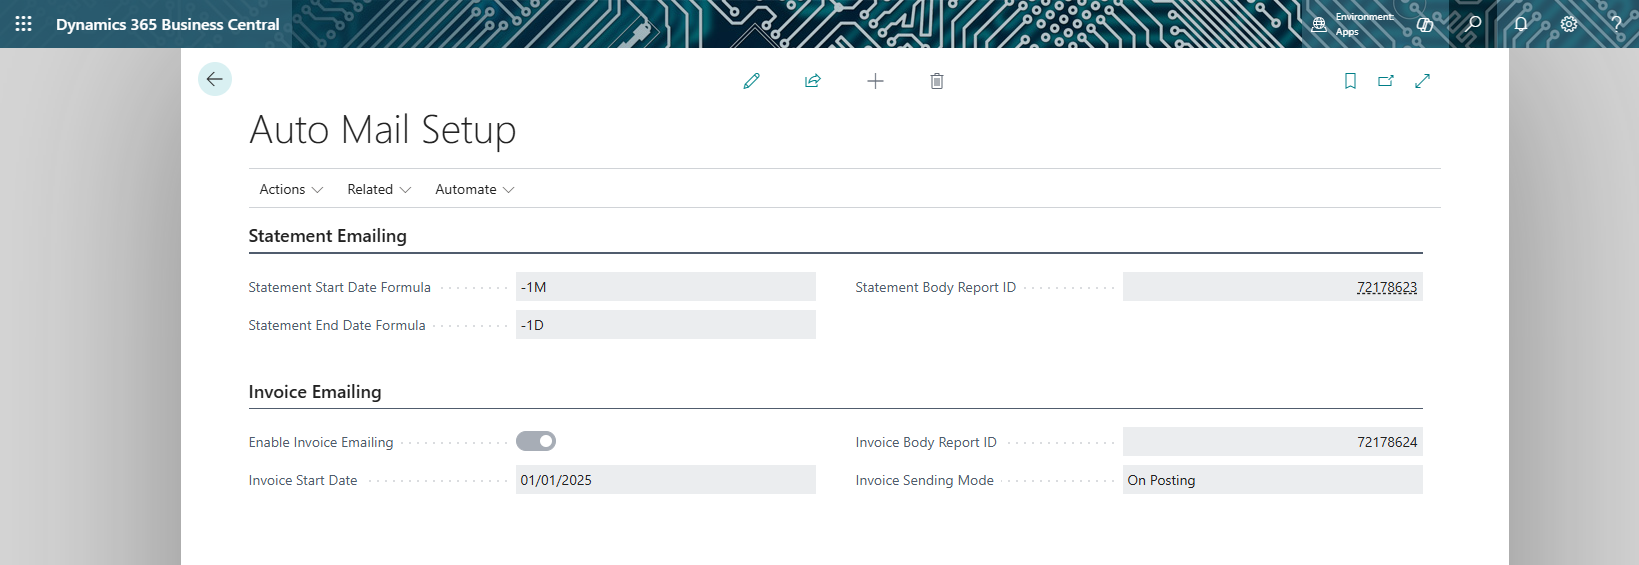
- Statement Start Date Formula: Specifies the start date of the statement period relative to the working date (e.g.,
-1Mfor the beginning of the last month). - Statement End Date Formula: Specifies the end date of the statement period (e.g.,
-1Dfor yesterday orCMfor current month). - Statement Body Report ID: Select the report used for the email body (e.g., standard Statement report or a custom one).
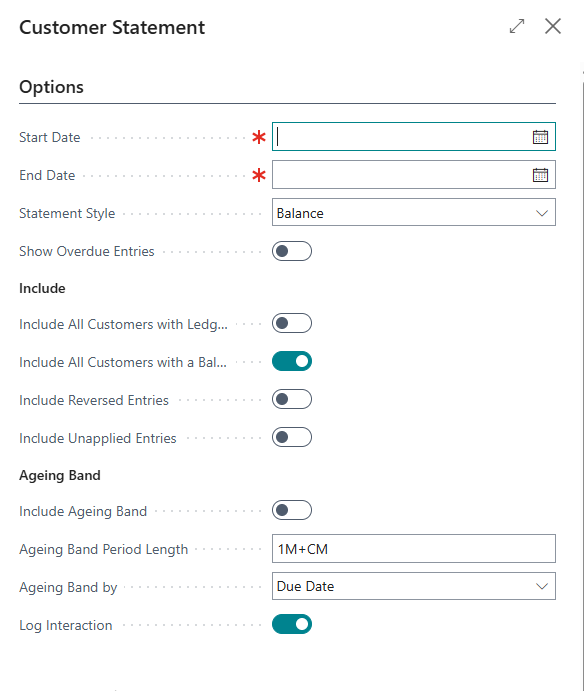
- Set Report Options: Click Actions - Save Statement Report Options in the menu to configure the layout and request page options (like "Include Aging Band") for the statement report. These settings are saved and used for all auto-generated statements.
- Enable Invoice Emailing: Toggle this to turn on invoice emailing.
- Invoice Start Date: Invoices posted on or after this date will be considered for emailing.
- Invoice Body Report ID: Select the report used for the invoice email body. The word layout linked to the report will be used for the Email body. The layout can be changed using standard BC report layout functionality
- Invoice Sending Mode:
- On Posting: Emails are sent immediately when an invoice is posted.
- Job Queue: Emails are queued and sent via a scheduled Job Queue Entry.
c. Job Queue Setup
To automate the sending process, Job Queue Entries are automatically setup by the extension. Job Status is set to On Hold. You have to change the Status to Ready, to start sending the emails.
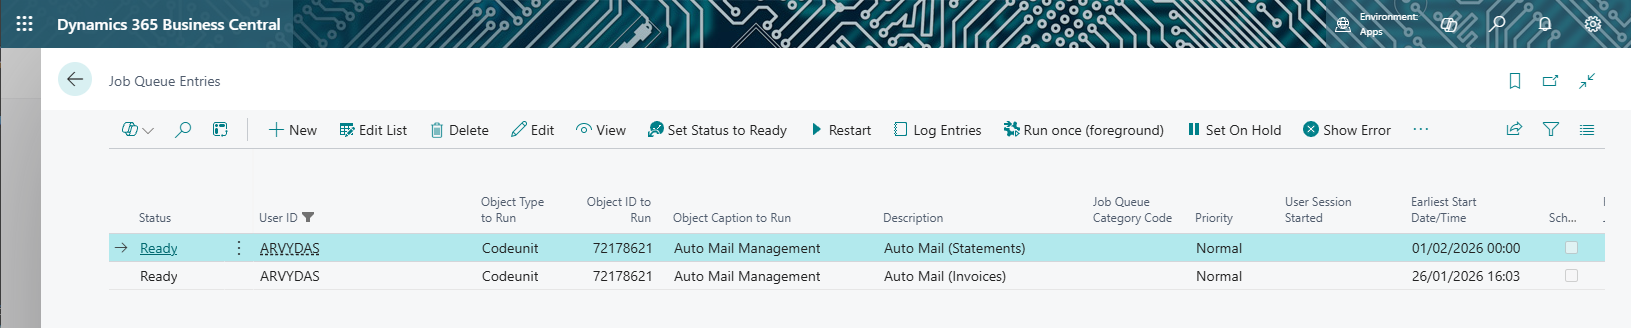
- Search for Job Queue Entries.
- Click Set Status to Ready.
- Other settings on the job queue
- Object Type to Run:
Codeunit - Object ID to Run:
Auto Mail Management(Search for "Auto Mail Management" or check the ID). - Parameter String:
- Enter
STATEMENTto schedule Statement generation and emailing. - Enter
INVOICEto schedule Invoice emailing (if using "Job Queue" mode).
- Enter
- Object Type to Run:
- Recurrence can be change as required (e.g., Daily at 8:00 AM).
2. Customer Auto Mail Selection
Manage which customers receive automatic emails using the Customer Auto Mail Selection page.
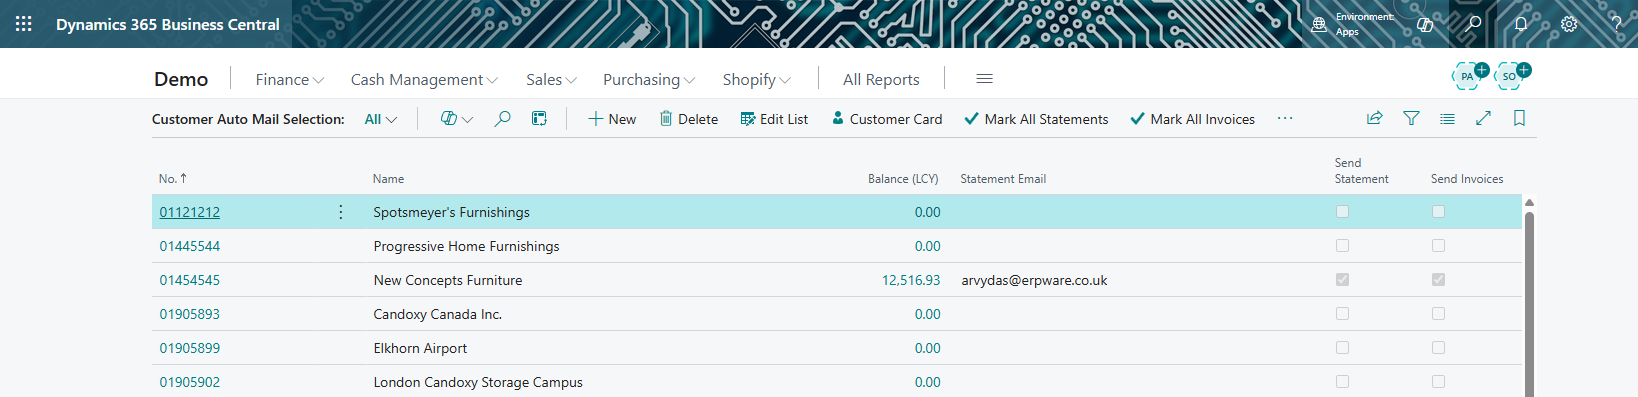
- Search for Customer Auto Mail Selection.
a. How Customer Email is Selected
The system determines the email address in the following priority:
- Document Layout: Checks "Document Layouts" for the customer (Usage: Statement).
- Customer Card: Uses the email address on the Customer Card.
- The resolved email is shown in the Statement Email column.
b. Selecting Customers
- Send Statement: Check this box to enable automatic statements for the customer.
- Send Invoices: Check this box to enable automatic invoice emailing.
Bulk Actions:
- Mark All Statements: Enables statements for all customers in the list.
- Mark All Invoices: Enables invoices for all customers in the list.
- Unmark All: Disables both options for all customers.
c. Manual Sending
You can trigger the process manually for testing or ad-hoc runs:
- Run Statements Now: Immediately processes statements for all enabled customers.
- Run Invoices Now: Immediately processes pending invoices for all enabled customers.
d. Document Filtering
- Statements are generated and sent every time the job runs or manual sending is initiated.
- Invoices are generated and sent only once.
3. Sent Mail History
a. Auto Mail Logs
View the history of sent documents.
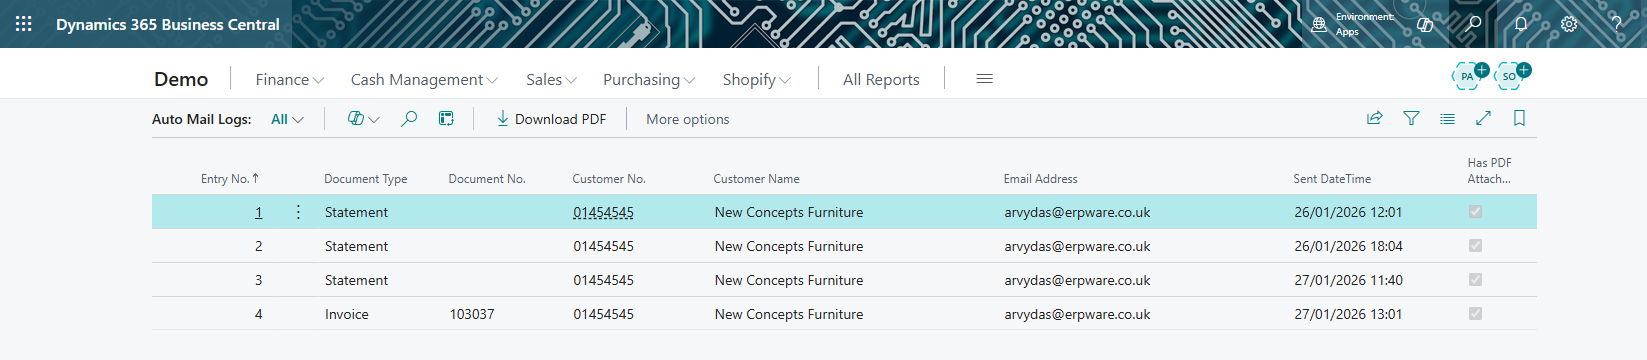
- Search for Auto Mail Logs or click Auto Mail Logs from the setup page.
- This list shows:
- Document Type: Statement or Invoice.
- Customer: Name and Number.
- Sent DateTime: When it was sent.
- Has PDF Attachment: Indicates if the generated PDF is stored.
To view the exact document that was sent:
- Select a log entry.
- Click the Download PDF action in the menu.
Auto Mail Log Factbox on Customer page shows all sent documents
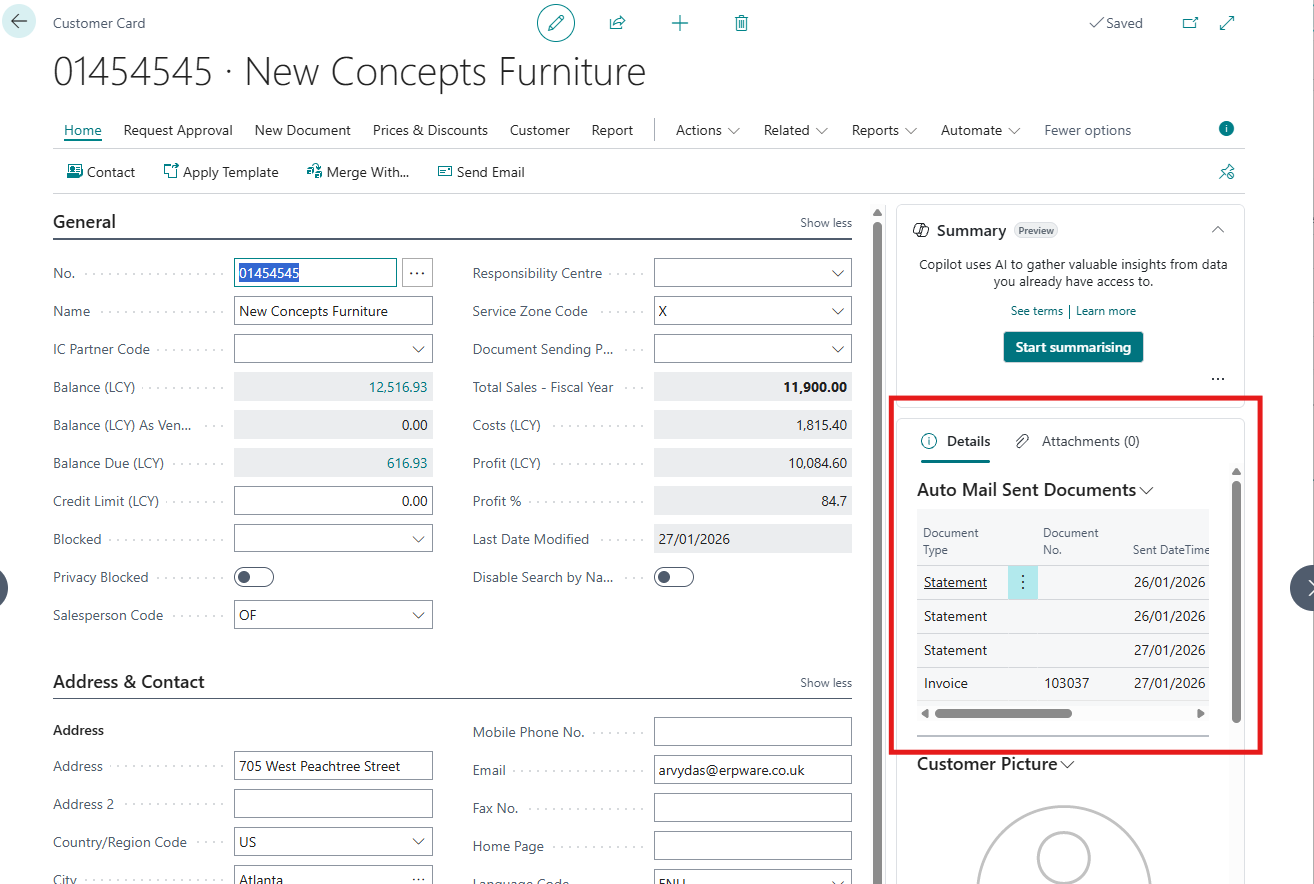
The pdf file can be downloaded by selecting Auto Mail Sent Documents - Download PDF.
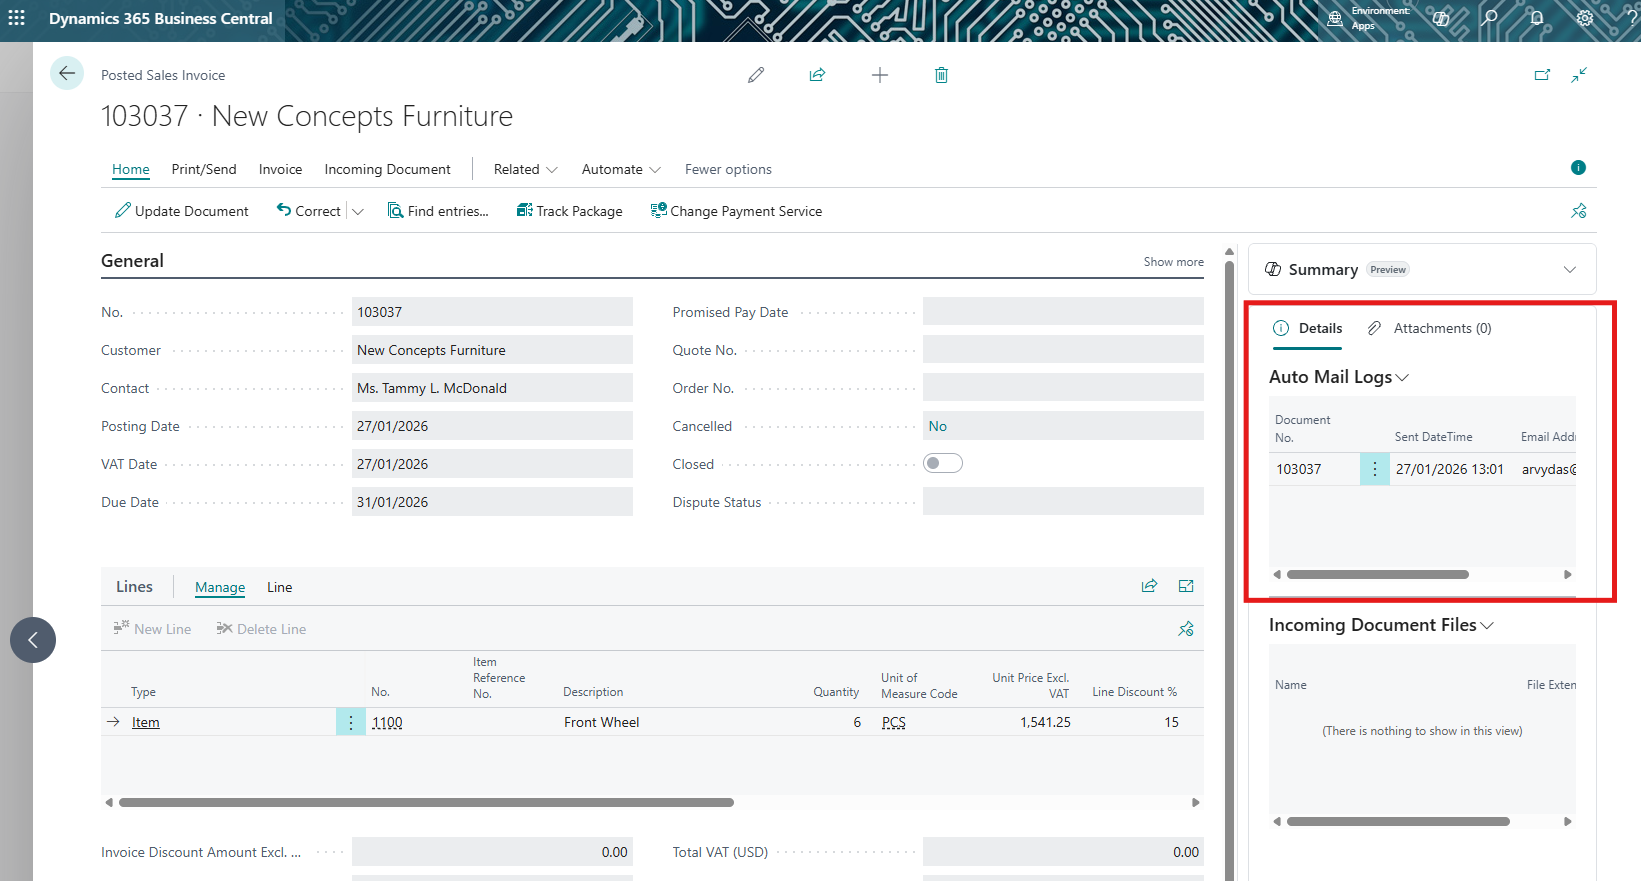
Auto Mail Log Factbox on Posted Sales Invoice page shows the invoice email sent to the customer
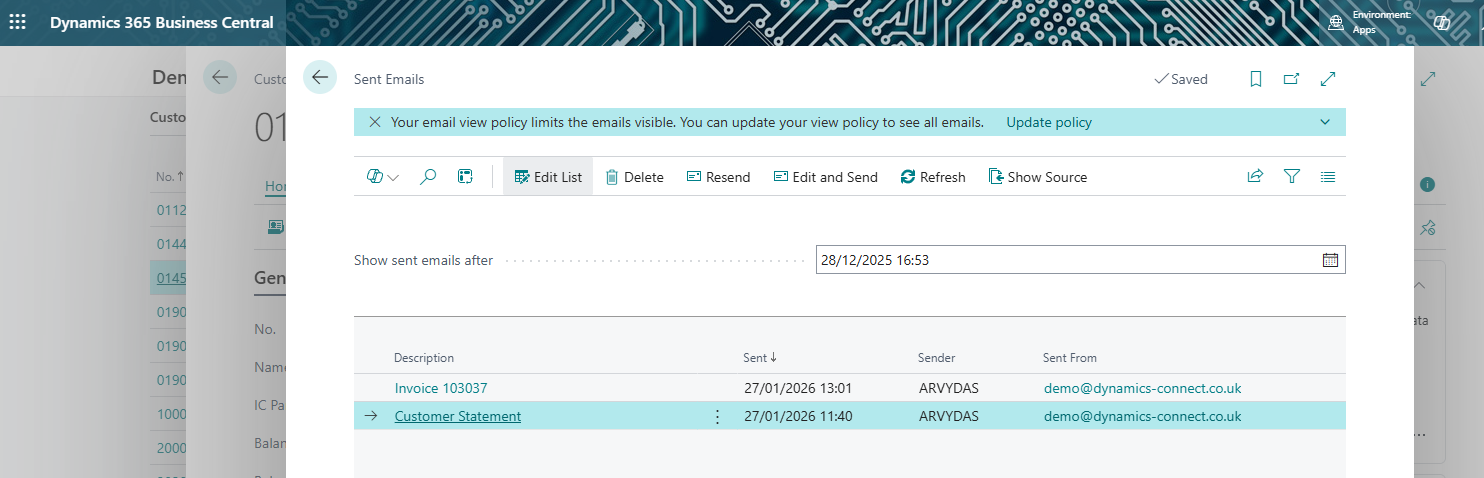
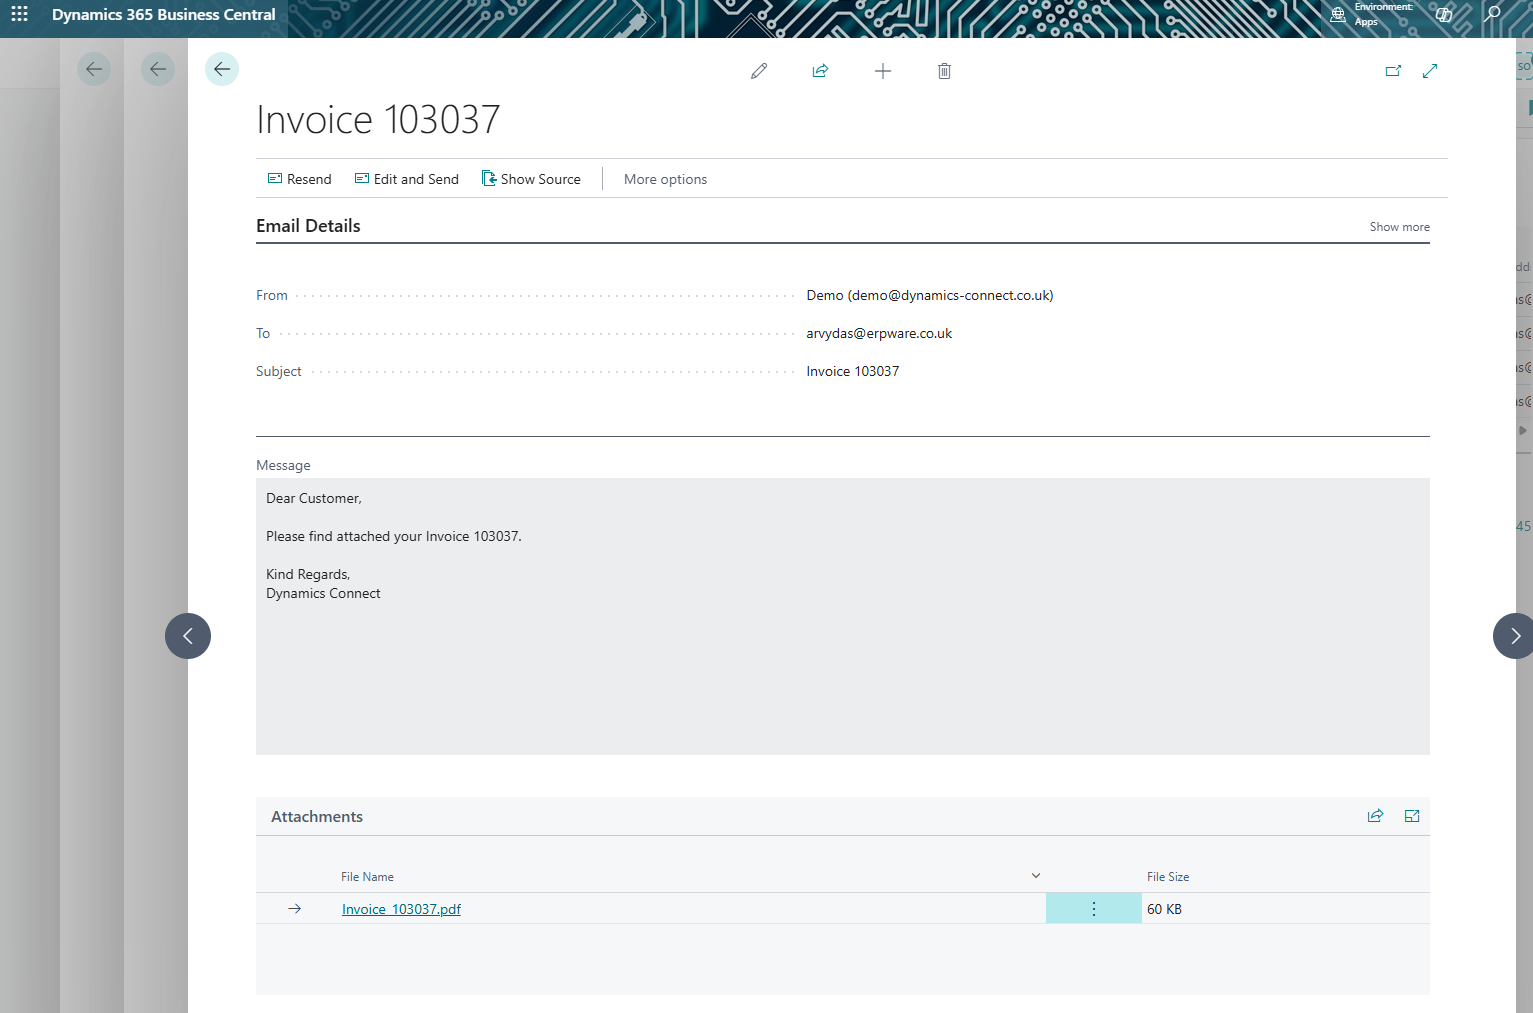
c. Sent Emails
Emails are also linked to all relevant recods
Select Related - History - Sent Emails. The page will show the list of sent emails. When you click on an email, it shows the body and the attachment that was sent in the email.
Automate Your Email Communications
Save time and improve customer communication with DCX Auto Mail for Business Central.
Contact us to find out how automated emailing can benefit your business.
Contact us